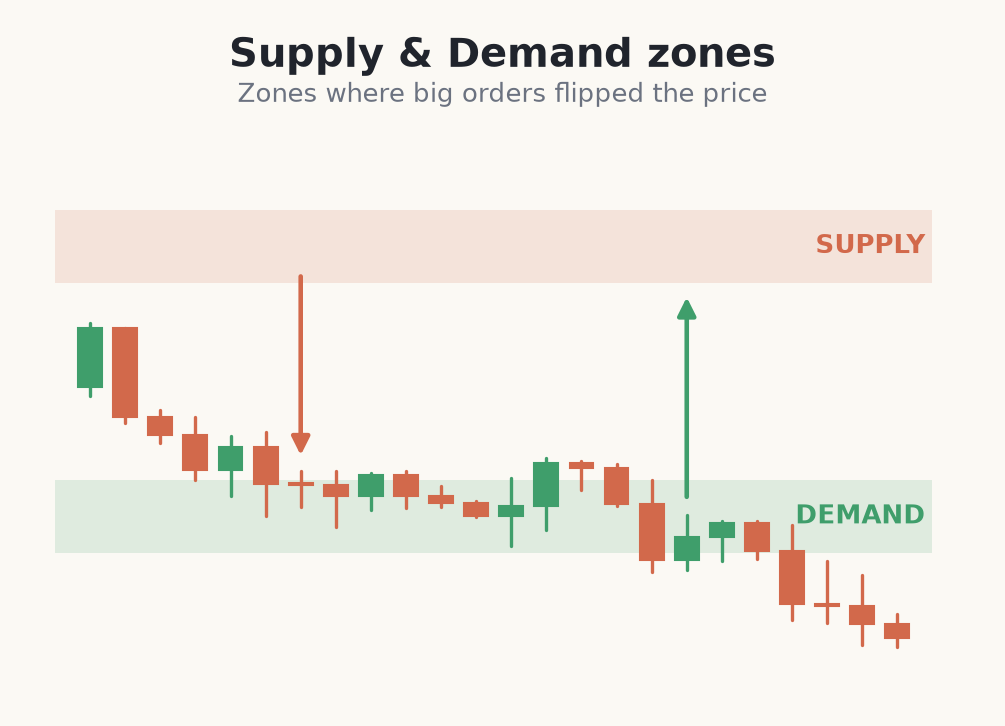
Supply and demand zones are the areas from which a strong, impulsive move began. A demand zone is the base where aggressive buying launched price upward; a supply zone is the base where aggressive selling drove price down. They mark where a large order imbalance existed — so many buyers (or sellers) that price could not stay still and had to move fast. When price returns to that base, the theory is that leftover unfilled orders are still waiting there.
How zones differ from lines
A support or resistance line is a single price defined by past reactions; a supply or demand zone is a rectangle drawn around the small consolidation that existed just before an explosive candle. The distinction matters because a zone is a decision area you prepare in advance — often before price has ever returned — whereas a level is confirmed by repeated touches. Zones let you plan an entry into an area price has not tested yet, which is both their strength and their risk.
How to spot a valid zone
Look for a tight base — a few small candles going nowhere — followed by a strong departure, one or more large candles that leave the base fast and do not look back. The sharper and faster the exit, the bigger the imbalance and the better the zone. A fresh zone that has not yet been retested tends to react more cleanly than one price has already grazed several times, because each touch consumes the leftover orders.
- Find the <strong>origin</strong> of a strong move, not the middle of it — the base is where the orders sat.
- Draw the box around the <strong>base candles</strong> before the impulse, from the body cluster to the extreme wick.
- <strong>Fresh, untested</strong> zones are generally higher quality than ones already revisited.
- The <strong>strength of the departure</strong> grades the zone: explosive exit = strong imbalance; a lazy drift out = weak, skip it.
How to trade a zone, step by step
Because a fresh zone often reacts on the first return, many traders place a resting limit order at its edge rather than waiting to react. The stop always goes beyond the far side of the zone: if price trades all the way through it, the imbalance was already absorbed and the idea is invalid.
Buying a fresh demand zone with a limit order
- 1On the 1-hour GBP/USD chart you spot a tight 3-candle base between 1.2500 and 1.2520, followed by an explosive rally to 1.2650. That base is your demand zone.
- 2You mark the zone from the base low 1.2500 to the base high 1.2520 — a 20-pip-wide rectangle.
- 3Rather than chase, you leave a buy limit at 1.2520 (the near edge of the zone), so you get filled the moment price returns.
- 4Your stop goes just below the far edge at 1.2485 — if price closes through the whole zone the imbalance is gone. Risk = 35 pips.
- 5You target the prior swing high at 1.2650, about 130 pips away — roughly a 3.7:1 reward-to-risk.
- 6On a €3,000 account risking 1% (€30) with a 35-pip stop, you size around 0.08 lots. If price never returns, no harm done — the order simply never fills.
Common beginner mistakes with supply & demand
- Drawing the zone on the impulse candle. The zone is the quiet base that came before the big move, not the big move itself.
- Trusting every zone equally. A weak, slow departure is not a real imbalance. Only trade zones born from an explosive exit.
- Reusing a tested zone. Once price has traded back into a zone and out again, most of the resting orders are gone. Prefer fresh zones.
- Making zones too wide. A 200-pip 'zone' is just a guess with a big stop. Tight base = tight zone = tight, sensible risk.
- Blindly trusting a limit order. Price can slice straight through a zone in a strong trend. The stop beyond the far edge is what keeps a bad zone from becoming a bad loss.
Zones mark the origin of strong moves — the footprints of the orders that pushed price hard. Trade fresh zones born from explosive departures, and put your stop beyond the far edge.