What it is: The Shark is a newer harmonic pattern with its own distinctive labelling. Instead of XABCD, it is mapped as 0-X-A-B-C, and it completes at point C. It often precedes deeper harmonic structures and is known for aggressive, fast reversals after a liquidity grab.
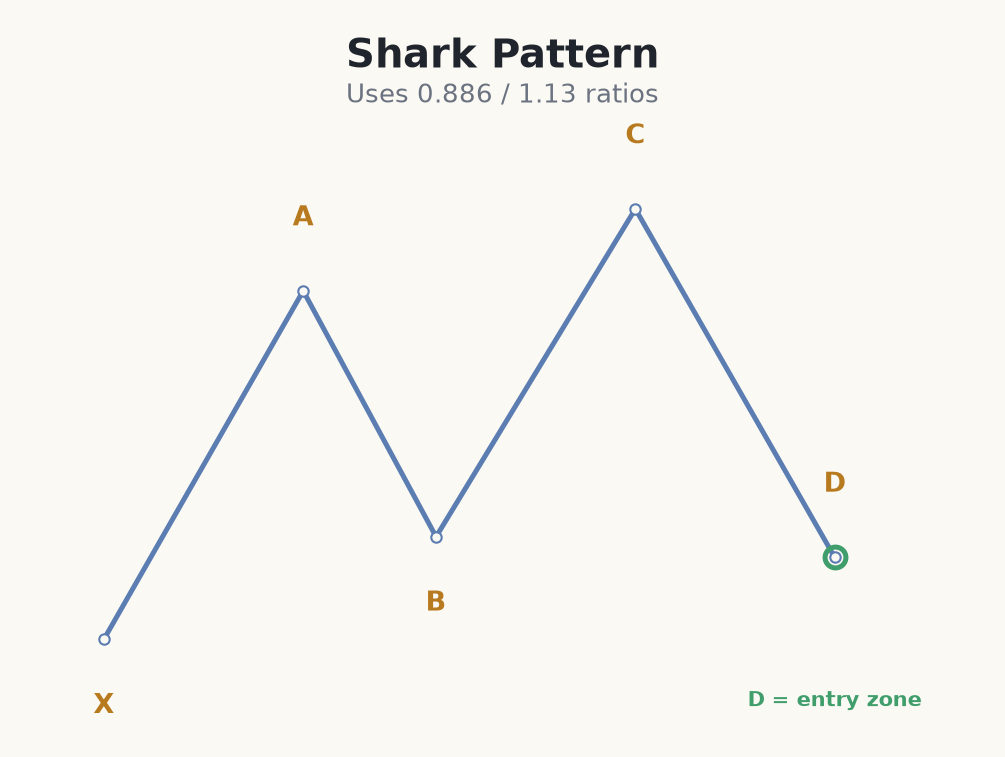
Defining ratios
- AB extends 113% to 161.8% of the XA leg.
- BC extends 161.8% to 224% of AB.
- C completes in the 88.6% to 113% zone of the 0-X leg.
- The pattern uses 0-X-A-B-C rather than XABCD labelling.
The Shark's completion zone around 88.6%–113% means C can slightly overshoot the 0 point, sweeping liquidity before reversing. This makes it feel like a stop hunt followed by a snap-back, which is why confirmation right at C is essential.
Trading the Shark
How to use it: enter at C as the completion zone reacts, with a stop just beyond C. Because the Shark often runs into a deeper pattern next, many traders take a quick target and stay nimble rather than holding for a large move. Treat it, like all harmonics, as subjective and probabilistic — never a certainty.
Why the overshoot matters: the 88.6%–113% zone lets C poke just past the 0 point, tripping the stops resting beyond it. That liquidity sweep is often what fuels the snap-back — the very traders who got stopped provide the reversal's momentum. It also means the Shark is a quick, reactive trade: take profit promptly, because a Shark that keeps going frequently morphs into a deeper Crab or Bat against you.
Bearish Shark short on GBP/USD (€1,000)
- 1GBP/USD prints a bearish Shark mapped 0-X-A-B-C, with the 0-X leg from 0 = 1.2650 to X = 1.2750 (100 pips).
- 2The extension legs complete and C projects into the 88.6%–113% zone of 0-X = 1.2739–1.2763. C tags 1.2758, sweeping the highs above X — a liquidity grab.
- 3Price snaps back and prints a bearish engulfing at C — confirmation. Entry 1.2752.
- 4Stop just beyond C at 1.2772 = 20 pips. Risk 1% of €1,000 = €10, size ≈ 0.050 lots (~€0.50/pip).
- 5Quick target back toward the B point / prior structure at 1.2700 (~52 pips, ~2.6:1) — you bank promptly because a Shark that keeps running often becomes a deeper pattern against you. A close above 1.2772 voids it.
Common Shark mistakes
- Using XABCD labelling. The Shark is 0-X-A-B-C and completes at C, not D. Mislabel it and your entry and stop land in the wrong place.
- Entering before the sweep reverses. C often overshoots the 0 point first. Buying/selling into the grab with no snap-back confirmation gets you run over.
- Holding for a big move. The Shark is a quick reversal that often rolls into a deeper pattern. Take profit promptly instead of overstaying.
- Treating the sweep as certain. Not every poke past 0 reverses — sometimes it is a genuine breakout. Wait for the reaction candle at C.
- Skipping the stop beyond C. The overshoot zone is noisy. Without a firm stop just past C, one more spike wipes the trade.
The Shark completes at C in the 88.6%–113% zone using 0-X-A-B-C labelling — a fast reversal trade with a stop just beyond C.